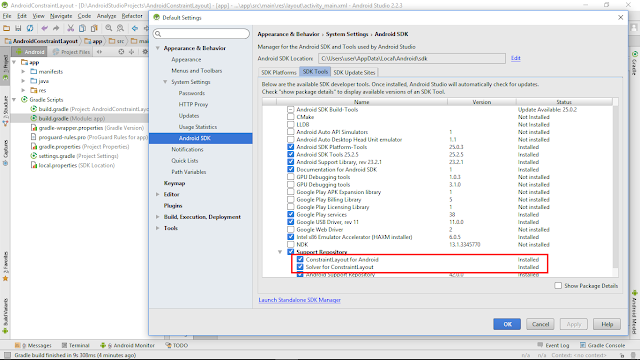
To use ConstraintLayout, make sure to install Support Repository of ConstraintLayout for Android and Solver for ConstraintLayout in Android SDK Manager:
Add dependency of ConstraintLayout library in your module-level build.gradle file:
dependencies {
    compile 'com.android.support.constraint:constraint-layout:1.0.0-beta4'
}
In the toolbar or sync notification, click Sync Project with Gradle Files.
We can convert an existing layout to a constraint layout in Android Studio's Layout Editor:
- Open your layout in Android Studio and click the Design tab at the bottom of the editor window.
- In the Component Tree window, right-click the layout and click Convert layout to ConstraintLayout.
After finished, the helloworld default layout converted to:
<?xml version="1.0" encoding="utf-8"?>
<android.support.constraint.ConstraintLayout xmlns:android="http://schemas.android.com/apk/res/android"
    xmlns:app="http://schemas.android.com/apk/res-auto"
    xmlns:tools="http://schemas.android.com/tools"
    android:id="@+id/activity_main"
    android:layout_width="match_parent"
    android:layout_height="match_parent"
    tools:context="com.blogspot.android_er.androidconstraintlayout.MainActivity">

    <TextView
        android:layout_width="wrap_content"
        android:layout_height="wrap_content"
        android:text="Hello World!"
        tools:layout_constraintTop_creator="1"
        android:layout_marginStart="16dp"
        android:layout_marginTop="16dp"
        tools:layout_constraintLeft_creator="1"
        app:layout_constraintLeft_toLeftOf="parent"
        app:layout_constraintTop_toTopOf="parent" />
</android.support.constraint.ConstraintLayout>
This video show howto, step-by-step:
Reference:
Build a Responsive UI with ConstraintLayout
More:
Building interfaces with ConstraintLayout in Android Studio


